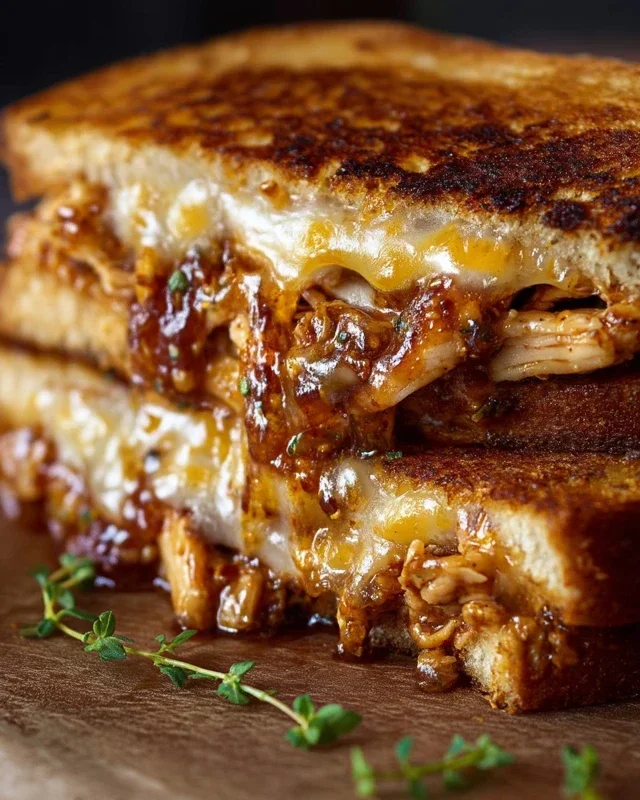
Smoky BBQ Chicken Grilled Cheese Sandwich Recipe
The BBQ Chicken Grilled Cheese Sandwich is more than just a meal; it’s a symphony of smoky, cheesy, and savory perfection. Forget your childhood grilled cheese – this elevated version takes comfort food to an entirely new level, and trust me, it’s going to become your new obsession. We all love the nostalgic crunch of perfectly toasted bread and the gooey embrace of melted cheese, but imagin extracte that classic experience infused with the vibrant, bold flavors of slow-cooked BBQ chicken. That’s the magic of this BBQ Chicken Grilled Cheese Sandwich. It’s the ultimate fusion, marrying the heartiness of a barbecue staple with the universally adored simplicity of a grilled cheese. What makes it truly special is the incredible balance it strikes: the tender, flavorful chicken nestled between crisp, golden-brown bread and a generous helping of melted, irresistible cheese. Get ready to transform your lunch or dinner with this incredible creation.
BBQ Chicken Grilled Cheese Sandwich
Forget everything you thought you knew about grilled cheese. We’re taking this humble sandwich to a whole new level of deliciousness with smoky, tangy BBQ chicken nestled between perfectly golden-brown, cheesy bread. This isn’t just a meal; it’s an experience, a flavor explosion that’s surprisingly easy to whip up. Whether you’re craving comfort food or looking for a quick and satisfying lunch or dinner, this BBQ Chicken Grilled Cheese Sandwich is guaranteed to hit the spot.
This recipe is all about maximizing flavor and achieving that perfect gooey, crispy balance. We’re starting with a quick and easy BBQ chicken filling that’s packed with savory goodness, then we’re elevating the classic grilled cheese by infusing the butter with garlic and parsley for an extra layer of aromatic appeal. The key is using good quality ingredients and taking your time to build those layers of flavor.
Let’s get started!
Ingredients:
Preparing the BBQ Chicken Filling
The foundation of our epic grilled cheese is a vibrant and flavorful BBQ chicken filling. This part is so simple, you’ll wonder why you haven’t made it before.
1. Start by heating the olive oil in a large skillet or frying pan over medium heat. Once the oil is shimmering, add your thinly sliced red onion. We want to sauté these onions until they become beautifully soft and slightly caramelized, which will bring out their natural sweetness and mellow their sharpness. This usually takes about 5-7 minutes. Stir them occasionally to ensure even cooking.
2. Next, add the minced garlic to the skillet with the onions. Cook for another minute until fragrant, being careful not to burn the garlic, as this can make it bitter. The aroma of garlic and onions together is just heavenly!
3. Now, it’s time to introduce the shredded roasted chicken to the pan. Stir it well to combine it with the softened onions and garlic. Sprinkle in the paprika, which will add a lovely smoky depth and a hint of warmth to the chicken. Follow this with the Worcestershire sauce, a secret ingredient that adds a complex umami flavor with its savory and slightly tangy notes.
4. Pour in the BBQ sauce and stir everything together until the chicken is thoroughly coated. Let this mixture simmer for about 5-10 minutes over low heat, allowing the flavors to meld and the sauce to thicken slightly. You want the chicken to be moist but not swimming in sauce. Taste and adjust seasoning if needed – perhaps a pinch more paprika or a dash of salt. Set this delicious filling aside to cool slightly while we prepare the bread.
Assembling and Grilling the Sandwiches
Now for the magic that transforms simple ingredients into a culinary masterpiece. We’re going to make sure every bite is a symphony of textures and tastes.
1. In a small bowl, combine the softened butter with the minced garlic and minced parsley. Mash it all together with a fork until it’s well incorporated. This herby, garlicky butter is going to give our grilled cheese an incredible crust and an aromatic punch that goes far beyond plain butter.
2. Lay out your 12 slices of sourdough or sturdy white bread. Spread a generous amount of the garlic-parsley butter evenly on one side of each slice. This is the side that will face outwards and get all toasty and golden in the pan.
3. Now, let’s build these bad boys. On the unbuttered side of six of the bread slices, arrange three slices of Havarti cheese. Don’t be shy with the cheese – it’s what makes a grilled cheese a grilled cheese!
4. Spoon a generous portion of the cooled BBQ chicken filling over the cheese on each of these six slices. Make sure to distribute it evenly, so you get that wonderful smoky chicken in every bite.
5. Top each sandwich with another two slices of Havarti cheese. This extra layer of cheese acts as a delicious glue, holding everything together and promising ultimate gooeyness.
6. Carefully place the remaining six bread slices, butter-side up, on top of the assembled sandwiches. You should now have 12 beautiful, ready-to-grill sandwiches.
The Grilling Process
This is where the transformation truly happens. Patience and a medium-low heat are your best friends here.
1. Heat a large non-stick skillet or griddle over medium-low heat. It’s important not to have the heat too high, or the bread will burn before the cheese has a chance to melt and the inside gets warm.
2. Carefully place the assembled sandwiches onto the preheated skillet. You may need to cook them in batches depending on the size of your skillet. Resist the urge to overcrowd the pan, as this will steam the sandwiches rather than grill them.
3. Grill for approximately 4-6 minutes per side, or until the bread is a deep golden brown and beautifully crisp, and the cheese is melted and oozing out the sides. You can peek underneath a sandwich gently with a spatula to check for browning. If the bread is browning too quickly, reduce the heat further.
4. Once both sides are perfectly golden and the cheese is wonderfully melted, carefully remove the sandwiches from the skillet. You can transfer them to a cutting board and let them rest for a minute or two – this allows the cheese to set slightly, making them easier to cut.
5. Cut each sandwich in half, either diagonally or straight down the middle. Serve immediately and prepare for an explosion of flavor! This BBQ Chicken Grilled Cheese Sandwich is the ultimate comfort food, perfect on its own or served with a side of coleslaw or crispy fries. Enjoy every delicious, cheesy, smoky bite!
Conclusion:
So there you have it – the ultimate guide to crafting your very own BBQ Chicken Grilled Cheese Sandwich! This recipe is a winner because it takes a beloved classic, the grilled cheese, and injects it with the smoky, sweet, and savory goodness of BBQ chicken. The combination of gooey melted cheese, tender shredded chicken coated in your favorite BBQ sauce, and perfectly toasted, buttery bread is simply irresistible. It’s a fantastic meal that’s both comforting and exciting, perfect for a quick weeknight dinner, a weekend lunch, or even a crowd-pleasing appetizer. I truly encourage you to give this BBQ chicken grilled cheese a try; I’m confident it will become a new favorite in your recipe rotation.
For serving suggestions, consider pairing it with a crisp coleslaw to balance the richness, a side of sweet potato fries, or even a simple green salad. For variations, feel free to experiment! Add some thinly sliced red onion for a little bite, a sprinkle of sharp cheddar or pepper jack cheese for extra flavor, or even a drizzle of ranch dressing for a creamy twist. The possibilities are endless, and the joy of customizing your BBQ chicken grilled cheese is part of the fun.
Frequently Asked Questions:
Q: What kind of bread works best for this BBQ Chicken Grilled Cheese?
A: While almost any bread can work, a slightly sturdier bread like sourdough, challah, or a good quality white bread holds up well to the fillings and gets wonderfully crisp when grilled. Just ensure it’s not too thin.
Q: Can I use leftover rotisserie chicken?
A: Absolutely! Rotisserie chicken is a fantastic shortcut. Simply shred it, toss it with your favorite BBQ sauce, and you’re ready to assemble your sandwich.
Q: How do I prevent the bread from burning before the cheese melts?
A: Cook over medium-low heat. This allows the bread to toast gradually to a beautiful golden brown while giving the cheese plenty of time to melt into gooey perfection. You can also cover the pan briefly with a lid to help trap heat and melt the cheese faster.
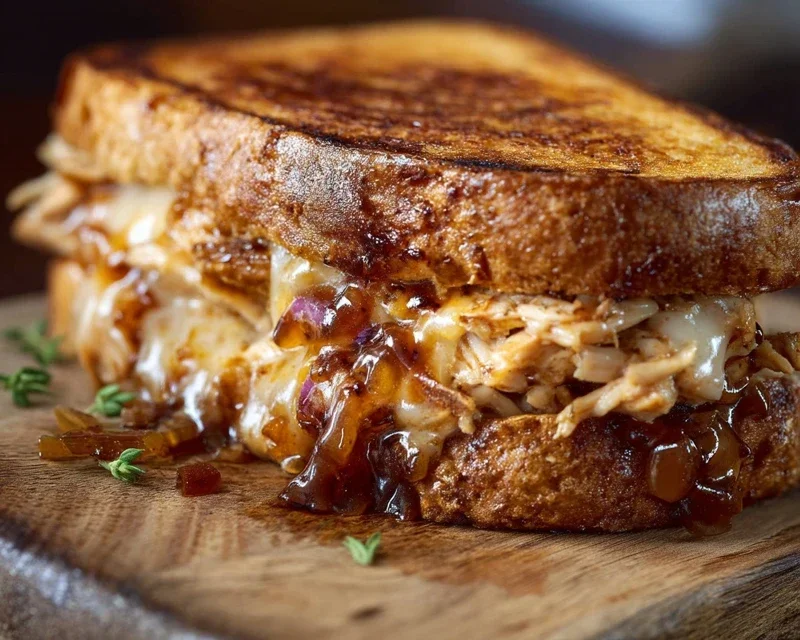
BBQ Chicken Grilled Cheese Sandwich
A flavorful grilled cheese sandwich featuring shredded roasted chicken tossed in smoky BBQ sauce, layered with melty Havarti cheese, and grilled to golden perfection on sourdough bread.
Ingredients
-
2 tablespoons olive oil
-
1 small red onion, thinly sliced
-
3 cloves garlic, minced
-
2 ½ cups shredded roasted chicken
-
½ teaspoon paprika
-
1 teaspoon Worcestershire sauce
-
1 cup BBQ sauce
-
12 slices Havarti cheese
-
¼ cup butter
-
2 cloves garlic, minced
-
2 teaspoons parsley, minced
-
12 slices sourdough bread or sturdy white bread
Instructions
-
Step 1
Heat olive oil in a skillet over medium heat. Add thinly sliced red onion and cook until softened, about 5 minutes. Add minced garlic and cook for 1 minute more until fragrant. -
Step 2
Add shredded roasted chicken, paprika, and Worcestershire sauce to the skillet. Stir to combine with the onions and garlic. -
Step 3
Pour in the BBQ sauce and stir well. Simmer for 5-7 minutes, allowing the sauce to thicken and coat the chicken. Remove from heat. -
Step 4
Butter one side of each slice of bread. In a separate small bowl, mix together the softened butter, minced garlic, and minced parsley. Spread this garlic-herb butter on the unbuttered side of each bread slice. -
Step 5
Assemble the sandwiches: Place 2 slices of Havarti cheese on the unbuttered side of 6 bread slices. Top with the BBQ chicken mixture. Add another 2 slices of Havarti cheese on top of the chicken. -
Step 6
Place the remaining 6 bread slices, butter-side up, on top of the assembled sandwiches. Grill in a preheated skillet or on a griddle over medium heat for 3-5 minutes per side, or until golden brown and the cheese is melted and gooey.
Important Information
Nutrition Facts (Per Serving)
It is important to consider this information as approximate and not to use it as definitive health advice.
Allergy Information
Please check ingredients for potential allergens and consult a health professional if in doubt.