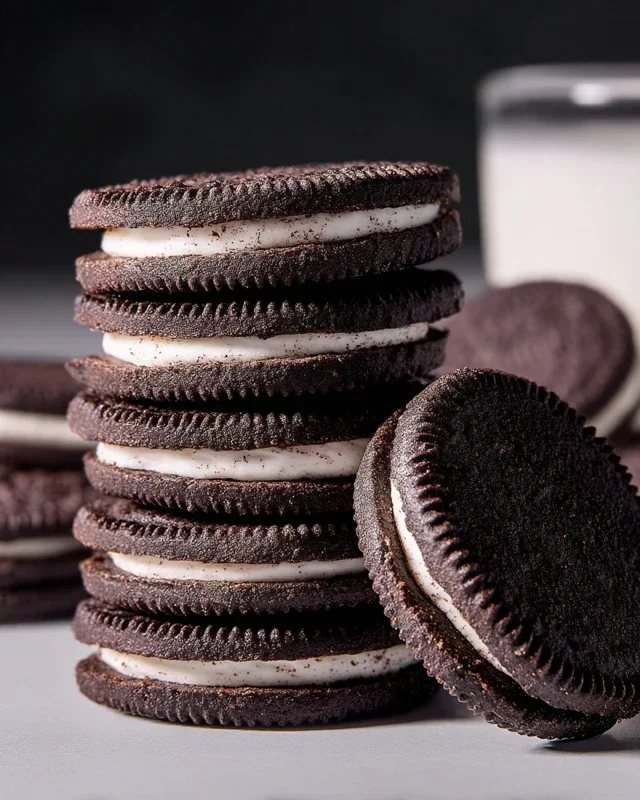
Homemade Oreo Cookies – Delicious Copycat Recipe
Homemade Oreo cookies are a true revelation for any cookie lover. There’s something undeniably magical about that perfect balance of rich, dark chocolate cookie and creamy, sweet vanilla filling. Forget those store-bought versions; when you bite into a truly homemade Oreo cookie, you’re experiencing a depth of flavor and a satisfying texture that’s simply unmatched. It’s a nostalgic treat for many, evoking childhood memories of dunking them in milk, but it’s also a sophisticated indulgence that impresses guests and satisfies even the most discerning sweet tooth. What makes these homemade Oreo cookies so special is the control we have over the ingredients, ensuring a superior taste and a more wholesome option. Get ready to elevate your cookie game and discover the joy of creating these iconic treats from scratch!
Homemade Oreo Cookies
There’s something undeniably magical about Oreos. That perfect balance of crisp, dark chocolate cookie and sweet, creamy filling is a flavor combination that has captured hearts (and taste buds) for generations. While store-bought Oreos are a convenient treat, there’s a unique satisfaction that comes with recreating that iconic flavor and texture right in your own kitchen. Today, we’re diving deep into the art of making homemade Oreos, a project that promises not just delicious cookies, but a fun and rewarding baking adventure. Forget the store shelves; we’re about to elevate your cookie game to a whole new level.
Making Oreos from scratch might seem daunting, but with a little patience and attention to detail, you’ll be amazed at how achievable this classic treat is. The key lies in understanding the nuances of the dough and the creamy filling. We’ll be using premium ingredients to ensure the best possible flavor and texture. So, gather your apron, preheat your oven, and let’s get ready to embark on a journey to Oreo cookie nirvana.
Ingredients:
Crafting the Dark Chocolate Cookies
Our journey begin extracts with creating the deeply rich and dark chocolate cookie dough. This is where the magic of achieving that signature Oreo look and taste truly starts.
1. Dry Ingredient Combination: In a medium bowl, whisk together the all-purpose flour, Dutch-process cocoa powder (or black cocoa powder for an even darker hue, if you can find it!), baking soda, baking powder, and 1/4 teaspoon of fine sea salt. Whisking thoroughly ensures that all the leavening agents and the cocoa are evenly distributed throughout the flour. This is crucial for consistent cookie rise and a uniform chocolate flavor. Set this bowl aside.
2. Creaming Butter and Sugar: In the bowl of a stand mixer fitted with the paddle attachment, or using a hand mixer and a large bowl, cream together the 1 cup of granulated sugar and the 10 tablespoons of unsalted butter. You want to beat these together until they are light and fluffy. This process, known as creaming, incorporates air into the mixture, which contributes to the cookies’ texture and helps them spread just the right amount. The butter should be at a cool room temperature – meaning it’s soft enough to indent with your finger but not melted or greasy. This is key for proper emulsification and a smooth cookie dough.
3. Adding the Egg and Vanilla: Once the butter and sugar are beautifully creamed, add the large egg, which should also be at room temperature. Beating the egg in a separate small bowl before adding it can help ensure it incorporates smoothly. Beat until well combined and the mixture looks slightly lighter. Next, add 1 teaspoon of the pure vanilla extract. The vanilla enhances the chocolate flavor and adds a subtle sweetness that rounds out the cookie. Scrape down the sides of the bowl as needed to ensure everything is incorporated.
4. Combining Wet and Dry Ingredients: Gradually add the dry ingredient mixture to the wet ingredients, mixing on low speed until just combined. Be careful not to overmix at this stage. Overmixing can develop the gluten in the flour too much, resulting in tough cookies. You’re looking for a cohesive dough that pulls away from the sides of the bowl.
5. Chilling the Dough: This is a vital step for managin extractg the dough and achieving the classic Oreo shape. Turn the dough out onto a clean surface and gently shape it into a disc or two flat rectangles. Wrap the dough tightly in plastic wrap and refrigerate for at least 2 hours, or until firm. Chilling the dough makes it easier to handle, prevents excessive spreading during baking, and allows the flavors to meld.
Shaping and Baking the Cookies
With our chilled dough ready, it’s time to bring our Oreos to life.
1. Rolling and Cutting: Once the dough is firm, unwrap it. You can either roll it out to about 1/4-inch thickness between two sheets of parchment paper and use a round cookie cutter (about 1.5-2 inches in diameter), or you can roll the dough into small balls and then flatten them slightly. For that authentic Oreo look, you can lightly press a fork onto the surface of the flattened dough to create a subtle pattern, though this is entirely optional. Place the cut cookies onto baking sheets lined with parchment paper, leaving a little space between them.
2. Baking to Perfection: Preheat your oven to 350°F (175°C). Bake the cookies for 10-12 minutes, or until the edges are set and they feel firm to the touch. They will not look overly done, as we want to preserve their dark color. The baking time can vary slightly depending on your oven, so keep an eye on them.
3. Cooling the Cookies: Let the cookies cool on the baking sheet for a few minutes before transferring them to a wire rack to cool completely. It’s crucial that they are completely cool before you attempt to fill them. Warm cookies will melt the filling and result in a messy outcome.
Whipping Up the Creamy Vanilla Filling
The iconic creamy center is what truly makes an Oreo an Oreo. This simple filling is surprisingly easy to make and delivers that signature sweet, vanilla punch.
1. Creaming the Filling Base: In a medium bowl, beat together the 1 stick of unsalted butter (also at a cool room temperature) with the remaining 1 teaspoon of pure vanilla extract until smooth and creamy.
2. Adding Powdered Sugar and Salt: Gradually add the sifted powdered sugar, 1/2 cup at a time, beating well after each addition. Sifting the powdered sugar is essential to prevent lumps and ensure a silky-smooth filling. Once all the powdered sugar is incorporated, add the 1/8 teaspoon of fine sea salt. The salt helps to balance the sweetness of the filling and enhance the vanilla flavor. Continue beating until the filling is light, fluffy, and has a consistency similar to buttercream frosting.
Assembling Your Homemade Masterpieces
The final, most satisfying step: bringin extractg it all together.
1. Filling the Cookies: Once both the cookie halves and the filling are completely cool, it’s time for assembly. Place about a tablespoon of the vanilla filling onto the flat side of one cookie half. Gently press another cookie half on top, twisting slightly to spread the filling evenly to the edges. Repeat this process with the remaining cookies and filling.
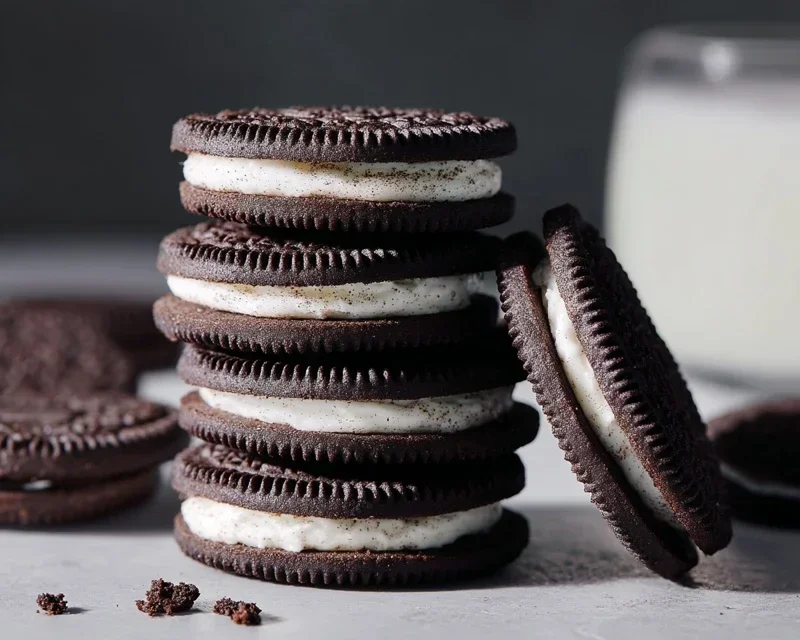
Congratulations! You’ve just made your very own batch of homemade Oreo cookies. Enjoy the rich chocolate crunch and the sweet, creamy center – a testament to your baking prowess. These cookies are best enjoyed fresh, perhaps with a tall glass of milk, but they also store well in an airtight container at room temperature for a few days. Happy baking!
Conclusion:
And there you have it – your very own homemade Oreo cookies, ready to rival any store-bought version! I hope you’ve enjoyed this journey into creating these iconic chocolate sandwich cookies from scratch. This recipe is fantastic because it allows you complete control over the ingredients, ensuring a rich, deeply chocolatey cookie with a perfectly creamy, sweet filling. The satisfaction of biting into a cookie you’ve made yourself is truly unparalleled.
These homemade Oreos are incredibly versatile. Enjoy them as a standalone treat, perfect with a tall glass of cold milk. They also make a stunning addition to desserts; crush them for a cheesecake base, sprinkle them over ice cream, or use them as a decadent garnish for milkshakes. For variations, consider adding a pinch of espresso powder to the cookie dough for a mocha twist, or perhaps a hint of peppermint extract to the filling for a festive flair. Don’t be afraid to experiment with different food colorings in the filling to match any occasion! I genuinely encourage you to give this recipe a try. It’s surprisingly straightforward and the results are so rewarding. You’ll wonder why you ever bought them pre-made!
Frequently Asked Questions:
Can I make the cookie dough and filling ahead of time?
Absolutely! You can prepare both the cookie dough and the cream cheese filling a day or two in advance. Store the cookie dough, tightly wrapped, in the refrigerator. The filling can be stored in an airtight container in the refrigerator. Allow both to come to room temperature slightly before proceeding with the recipe for easier handling.
How should I store my homemade Oreo cookies?
Store your finished homemade Oreo cookies in an airtight container at room temperature for up to 3-4 days. For longer storage, you can refrigerate them, which will also help keep the filling firm. If you freeze them, it’s best to freeze the assembled cookies, layered with parchment paper between them, for up to a month.
Homemade Oreo Cookies
Recreate the iconic chocolate sandwich cookie at home with this easy recipe for homemade Oreo cookies, featuring a crisp chocolate cookie and creamy vanilla filling.
Ingredients
-
1 1/4 cups (159 grams) all-purpose flour
-
1/2 cup (43 grams) Dutch-process cocoa powder
-
1 teaspoon baking soda
-
1/4 teaspoon baking powder
-
1/4 teaspoon fine sea salt
-
1 cup (200 grams) granulated sugar
-
10 tablespoons (142 grams) unsalted butter, at a cool room temperature, cut into chunks
-
1 large egg, at room temperature
-
1 stick (113 grams) unsalted butter, at a cool room temperature
-
2 1/2 teaspoons pure vanilla extract
-
2 1/2 cups (313 grams) powdered sugar, sifted
-
1/8 teaspoon fine sea salt
Instructions
-
Step 1
In a medium bowl, whisk together the all-purpose flour, Dutch-process cocoa powder, baking soda, baking powder, and 1/4 teaspoon fine sea salt. Set aside. -
Step 2
In a large bowl, cream together the granulated sugar and 10 tablespoons of unsalted butter until light and fluffy. Beat in the large egg and vanilla extract until well combined. -
Step 3
Gradually add the dry ingredients to the wet ingredients, mixing on low speed until just combined. The dough will be crumbly. -
Step 4
Divide the dough in half, flatten each half into a disc, wrap in plastic wrap, and chill for at least 1 hour, or until firm. -
Step 5
Preheat your oven to 350°F (175°C). Line baking sheets with parchment paper. -
Step 6
On a lightly floured surface, roll out one disc of dough to about 1/8-inch thickness. Use a round cookie cutter (about 1.5-2 inches in diameter) to cut out cookies. Reroll scraps as needed. Place cookies on prepared baking sheets. -
Step 7
Bake for 8-10 minutes, or until the edges are set and the centers are still slightly soft. Let cool on the baking sheets for a few minutes before transferring to a wire rack to cool completely. -
Step 8
For the filling, in a large bowl, beat the remaining 1 stick of unsalted butter until smooth. Gradually add the sifted powdered sugar and 1/8 teaspoon fine sea salt, beating until light and fluffy. -
Step 9
Once cookies are completely cool, spread a dollop of filling on the flat side of one cookie and top with another cookie, gently pressing to form a sandwich.
Important Information
Nutrition Facts (Per Serving)
It is important to consider this information as approximate and not to use it as definitive health advice.
Allergy Information
Please check ingredients for potential allergens and consult a health professional if in doubt.