Easy Chia Seed Pudding Recipe – Healthy Dessert
Chia seed pudding recipe perfection is within your grasp! If you’re searching for a breakfast or snack that’s as nourishing as it is delicious, you’ve landed in the right place. This simple yet incredibly satisfying chia seed pudding recipe is a game-changer for busy mornings and healthy cravings. What’s not to love? It’s packed with fiber, omega-3 fatty acids, and antioxidants, making it a powerhouse of nutrition. People adore this dish because it’s wonderfully versatile, allowing for endless flavor combinations and toppings. From creamy coconut milk bases to vibrant fruit swirls, the possibilities are truly endless. This chia seed pudding recipe is special because it requires minimal effort for maximum reward, transforming humble chia seeds into a delightful, pudding-like treat that feels like a decadent indulgence while actually fueling your body with goodness.
Chia Seed Pudding Recipe
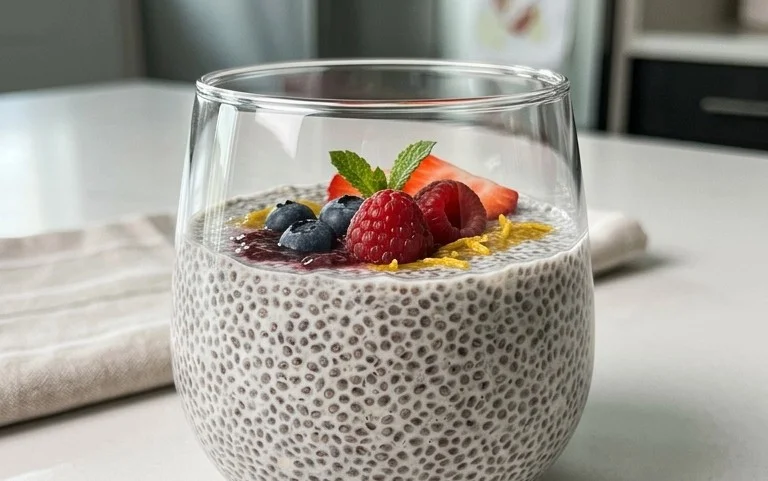
Chia seed pudding is one of those magical recipes that feels both incredibly decadent and wonderfully healthy. It’s the perfect make-ahead breakfast, a satisfying snack, or even a light dessert. The beauty of chia seed pudding lies in its simplicity and versatility. With just a few basic ingredients, you can create a creamy, nutrient-packed treat that’s ready to enjoy whenever the craving strikes. I love how the tiny chia seeds transform into a gelatinous, pudding-like texture when combined with liquid, absorbing all the flavors you add. It’s a delightful textural experience, and the health benefits are a huge bonus! Chia seeds are packed with fiber, omega-3 fatty acids, and various micronutrients, making this pudding a guilt-free indulgence.
Ingredients:
Instructions:
Combine the Base Ingredients: In a medium bowl or a jar with a lid, add your 3 tablespoons of chia seeds. These tiny powerhouses are the star of the show, responsible for the pudding’s signature texture. Next, pour in your 3/4 cup of milk. I usually opt for unsweetened almond milk or coconut milk for a subtle, creamy flavor that doesn’t overpower the other ingredients. However, feel free to experiment with any milk you have on hand – oat milk provides a lovely creaminess, and dairy milk works perfectly well too. The key here is to ensure all the chia seeds are submerged in the liquid. If you’re using a bowl, give it a good stir to distribute the seeds evenly and prevent clumps from forming.
Sweeten and Flavor: Now it’s time to add a touch of sweetness and warmth. Add 1 tablespoon of maple syrup to the mixture. I love the rich, natural sweetness of maple syrup, but you can absolutely substitute it with your preferred sweetener. Honey, agave nectar, or even a sprinkle of your favorite granular sweetener will work. Adjust the amount to your personal taste – if you prefer a less sweet pudding, start with a little less and add more later if needed. Following that, add 1 teaspoon of vanilla extract. Vanilla is a flavor enhancer that rounds out the taste and adds that comforting aroma we all associate with delicious desserts. Stir everything together thoroughly. Make sure the sweetener and vanilla are well incorporated into the milk and chia seed mixture.
The Crucial First Stir and Rest: This is a vital step for achieving a smooth, lump-free pudding. After you’ve combined everything, give the mixture one final, thorough stir. Pay attention to the bottom of your bowl or jar to ensure no chia seeds have settled and clumped together. Now, let the mixture sit for about 5-10 minutes. During this short resting period, the chia seeds will begin extract to absorb some of the liquid and swell slightly. This initial swelling is important because it helps to prevent the seeds from clumping together when they fully hydrate. After the 5-10 minutes, give the mixture another good stir. You’ll notice it’s already starting to thicken a bit. This second stir is crucial for breaking up any seeds that might still be trying to stick together.
Chill and Thicken: Once you’ve completed the second stir, cover your bowl or jar tightly with a lid or plastic wrap. Place it in the refrigerator to chill and allow the magic to happen. You’ll want to let it sit for at least 2-3 hours, but for the best, thickest, and creamiest pudding, I highly recommend letting it chill overnight. The longer it sits, the more the chia seeds will absorb the liquid, creating that delightful, gelatinous pudding texture we’re aiming for. The refrigerator is the perfect environment for this slow hydration process. Resist the urge to peek too often; patience is key here! As it chills, the pudding will continue to thicken into a spoonable consistency.
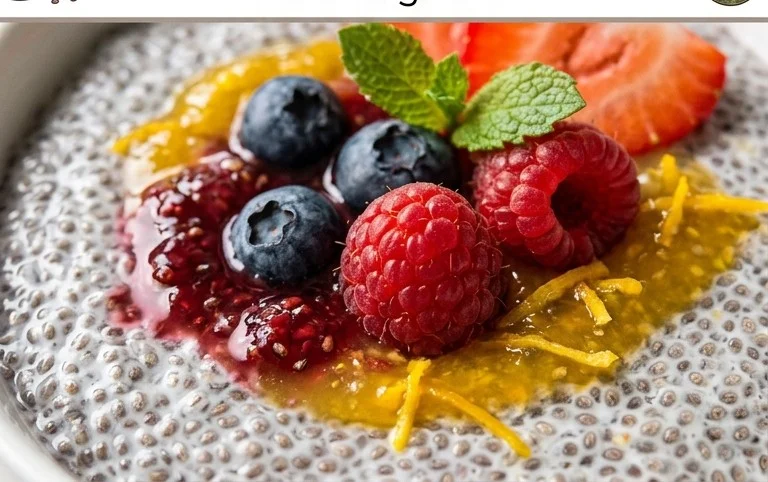
Serve and Enjoy: When you’re ready to enjoy your chia seed pudding, give it one final stir. It should be thick and creamy, with no discernible liquid remaining. If it’s a little too thick for your liking, you can stir in another tablespoon or two of milk until you reach your desired consistency. Now for the best part – the toppings! This is where you can really get creative and personalize your pudding. Some of my favorite toppings include fresh berries (raspberries, blueberries, strawberries), a sprinkle of granola for crunch, a dollop of yogurt, a drizzle of extra maple syrup, or even some chopped nuts like almonds or walnuts for added texture and healthy fats. The possibilities are endless! This recipe serves one, but it’s easily scalable to make a larger batch for the week ahead. Just multiply the ingredients accordingly.
Conclusion:
And there you have it! This chia seed pudding recipe is a true game-changer for anyone looking for a delicious, healthy, and incredibly easy breakfast or snack. Its versatility is a major draw – simply blend your favorite milk (dairy or non-dairy!), chia seeds, a touch of sweetener, and a dash of vanilla. The magic happens as the chia seeds absorb the liquid, creating a wonderfully thick and satisfying pudding that’s packed with fiber, omega-3 fatty acids, and antioxidants.
I love serving my chia seed pudding chilled, topped with fresh berries for a burst of natural sweetness and vibrant color. Other fantastic serving suggestions include a sprinkle of granola for added crunch, a drizzle of honey or maple syrup for extra indulgence, or even some toasted nuts for a nutty flavor profile. Don’t be afraid to get creative with variations! Consider adding cocoa powder for a chocolatey twist, a spoonful of nut butter for extra creaminess, or even a pinch of cinnamon or cardamom for warmth and spice. I highly encourage you to give this simple yet rewarding recipe a try. It’s the perfect way to start your day with wholesome goodness or to satisfy those mid-afternoon cravings!
Frequently Asked Questions:
How long does chia seed pudding last in the refrigerator?
My chia seed pudding typically stays fresh and delicious in an airtight container in the refrigerator for up to 3-4 days. The texture might thicken slightly over time, but it’s still perfectly edible!
Can I make chia seed pudding without any sweetener?
Absolutely! If you prefer a less sweet option, you can omit the sweetener altogether. The natural sweetness from toppings like fresh fruit can often be enough. Alternatively, you can experiment with natural sweeteners like stevia or monk fruit if you’re watching your sugar intake.
What’s the best type of milk to use for chia seed pudding?
You can use almost any type of milk! Almond milk, coconut milk, oat milk, soy milk, and even regular dairy milk all work wonderfully. Each will impart a slightly different flavor and texture to your pudding, so feel free to experiment and find your favorite!
Chia Seed Pudding Recipe
A simple and healthy chia seed pudding that’s easily customizable.
Ingredients
-
3 tablespoons chia seeds
-
1 tablespoon maple syrup
-
1 teaspoon vanilla
-
3/4 cup milk
-
1/4 cup mixed berries (optional garnish)
-
1 tablespoon chopped nuts (optional garnish)
Instructions
-
Step 1
In a bowl or jar, combine the chia seeds, maple syrup, and vanilla. -
Step 2
Pour in the milk and whisk or stir well to combine, ensuring no clumps of chia seeds form. -
Step 3
Let the mixture sit for 5-10 minutes, then stir again to prevent clumping. -
Step 4
Cover the bowl or jar and refrigerate for at least 2 hours, or preferably overnight, until thickened. -
Step 5
Once thickened, stir the pudding. Serve chilled. -
Step 6
Garnish with mixed berries and chopped nuts, if desired.
Important Information
Nutrition Facts (Per Serving)
It is important to consider this information as approximate and not to use it as definitive health advice.
Allergy Information
Please check ingredients for potential allergens and consult a health professional if in doubt.