Crispy Baked Zucchini Chips- Easy Healthy Snack
Crispy Baked Zucchini Chips are an absolute game-changer, and I can’t wait for you to try them! If you’re like me, you’re always on the lookout for delicious ways to enjoy your summer squash, and these chips deliver in spades. Forget soggy, bland vegetables; these Crispy Baked Zucchini Chips are a revelation. They offer that satisfying crunch you crave from your favorite fried snacks, but with a fraction of the oil and none of the guilt. The magic lies in the simple preparation and the perfect balance of seasonings that coax out the zucchini’s natural sweetness while creating an irresistible texture. They’re perfect as a light appetizer, a healthy side dish, or even a sneaky way to get more veggies into picky eaters. Trust me, once you experience the golden-brown perfection of these Crispy Baked Zucchini Chips, you’ll be making them again and again!
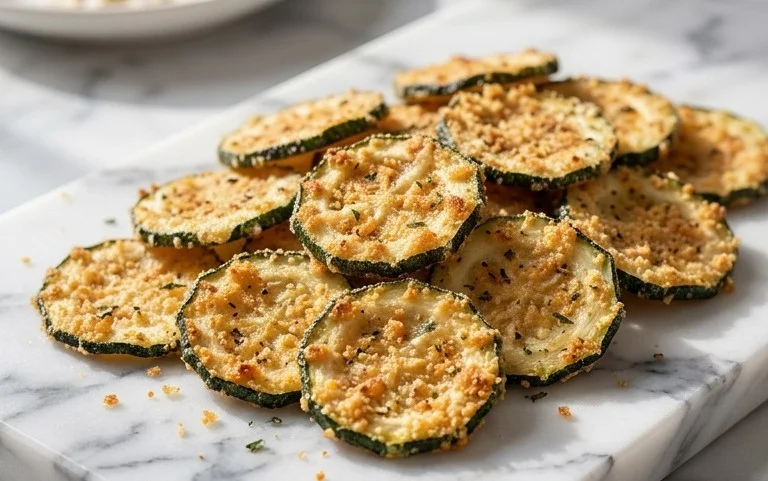
Crispy Baked Zucchini Chips
There’s something incredibly satisfying about a perfectly crispy snack, and when that snack is also healthy and packed with flavor, it’s a win-win situation. My absolute go-to for a light and delicious treat is these crispy baked zucchini chips. Forget those store-bought, often greasy alternatives; these homemade wonders are incredibly easy to make and deliver a fantastic crunch with just a few simple ingredients. I love how versatile they are – they make a fantastic appetizer, a healthy side dish, or even a delightful snack to munch on while watching your favorite movie. The key to getting them perfectly crisp lies in a few simple techniques that I’ll walk you through. You’ll be amazed at how quickly you can transform a humble zucchini into a delightful, guilt-free indulgence.
Ingredients:
Cooking Instructions:
1.
Prepare the Zucchini
Start by ensuring your zucchini is thoroughly washed and completely dry. Moisture is the enemy of crispiness, so take your time here. Pat it down with paper towels or a clean kitchen towel until there’s no visible water. Next, you’ll need to slice the zucchini. The goal is to get very thin, uniform slices. I find a mandoline slicer to be the absolute best tool for this, as it ensures consistent thickness, which is crucial for even baking. If you don’t have a mandoline, you can use a very sharp knife, but be extra careful to make the slices as thin and even as possible, aiming for about 1/16th of an inch thick. Thicker slices will steam more than crisp. Discard the ends of the zucchini.
2.
Season and Toss
Once all your zucchini slices are ready, it’s time to season them. In a large bowl, combine the olive oil, kosher salt, black pepper, onion powder, and paprika. Give it a good whisk with a fork to ensure the spices are well distributed throughout the oil. Now, add your thinly sliced zucchini to the bowl. Gently toss the zucchini slices with your hands or a spatula, making sure each slice is lightly coated with the seasoned oil. It’s important not to overdo the oil; we want just enough to help the spices adhere and promote browning, not to make the chips greasy. Over-oiling can lead to soggy chips.
3.
Arrange for Baking
This step is critical for achieving that coveted crispiness. Preheat your oven to 400°F (200°C). Line two large baking sheets with parchment paper. The parchment paper prevents sticking and makes cleanup a breeze. Now, carefully arrange the seasoned zucchini slices in a single layer on each baking sheet. Crucially, make sure the slices are not overlapping. If they are crowded, they will steam instead of bake and won’t get crispy. You might need to use more than one baking sheet, or bake in batches, to ensure adequate space between each slice. This air circulation is key to dehydration and crisping.
4.
The Baking Process
Place the baking sheets in the preheated oven. Bake for 10-15 minutes. During this time, keep a close eye on them, as they can go from perfectly crisp to burnt very quickly. After about 10 minutes, check the zucchini. You’re looking for them to be lightly golden brown and starting to curl around the edges. Carefully flip each zucchini slice using a spatula. This ensures even cooking and crisping on both sides. Once flipped, continue baking for another 5-10 minutes, or until they are golden brown and firm to the touch. The exact baking time will depend on the thickness of your slices and your oven.
5.
Cooling for Ultimate Crispness
Once they’re golden and crisp, carefully remove the baking sheets from the oven. The zucchini chips will continue to crisp up as they cool. It’s important to let them cool completely on the baking sheets, or even better, transfer them to a wire rack. This allows air to circulate all around them, preventing any trapped steam from making them soft. I know it’s tempting to dive in immediately, but resist the urge! The waiting is truly worth it. Once fully cooled, they should be wonderfully crisp and ready to enjoy. Store any leftovers in an airtight container at room temperature for a day or two, though I guarantee they won’t last that long!
Conclusion:
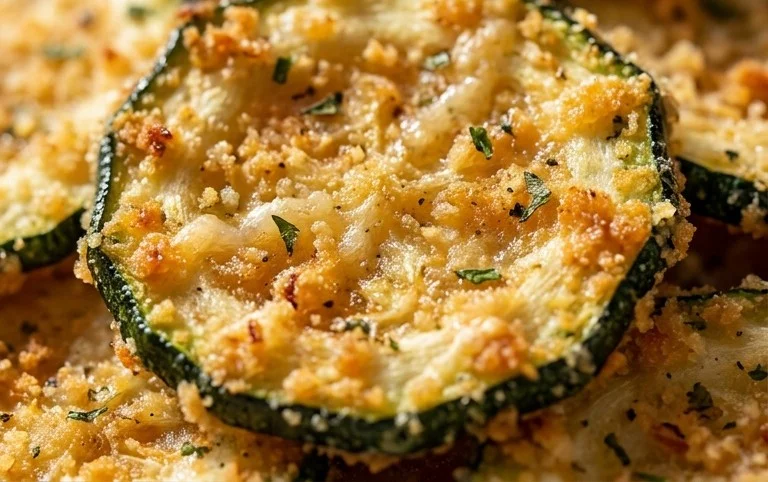
And there you have it – perfectly crispy baked zucchini chips! I hope you’re as excited as I am to whip up this incredibly easy and satisfying snack. This recipe is a fantastic way to enjoy vegetables in a fun, guilt-free way, offering a delightful crunch that rivals any fried alternative without the grease. They’re incredibly versatile, making them a go-to for a healthy appetizer, a movie night treat, or even a creative addition to your lunchbox. Don’t hesitate to experiment with different seasonings; paprika, garlic powder, or even a pinch of cayenne can elevate your baked zucchini chips to a whole new level of deliciousness. I truly encourage you to give this recipe a try – I’m confident you’ll be hooked!
Frequently Asked Questions:
How do I ensure my zucchini chips are crispy and not soggy?
The key to crispy baked zucchini chips lies in two main steps: ensuring the zucchini is sliced thinly and uniformly, and crucially, patting it extremely dry with paper towels after slicing. Removing as much moisture as possible before baking is paramount. Also, avoid overcrowding the baking sheet; give each chip space to breathe so air can circulate and crisp them up evenly.
Can I make these ahead of time?
While baked zucchini chips are best enjoyed fresh out of the oven for maximum crispness, you can make them a few hours in advance. Store them in a single layer in an airtight container at room temperature. If they lose a little crispness, you can briefly reheat them in a low oven (around 300°F or 150°C) for a few minutes to revive their texture.
Crispy Baked Zucchini Chips
A simple and healthy recipe for making crispy baked zucchini chips, perfect as a snack or side dish.
Ingredients
-
1 medium zucchini (washed and dried)
-
1 tablespoon olive oil
-
½ teaspoon kosher salt
-
½ teaspoon black pepper
-
¼ teaspoon onion powder
-
½ teaspoon paprika
Instructions
-
Step 1
Preheat oven to 400°F (200°C). Line a baking sheet with parchment paper. -
Step 2
Slice the zucchini thinly, about 1/16 inch thick. A mandoline slicer is recommended for even slices. -
Step 3
In a medium bowl, toss the zucchini slices with olive oil, kosher salt, black pepper, onion powder, and paprika until evenly coated. -
Step 4
Arrange the zucchini slices in a single layer on the prepared baking sheet. Ensure they do not overlap. -
Step 5
Bake for 15-20 minutes, flipping halfway through, until the chips are golden brown and crispy. Cooking time may vary depending on slice thickness and oven. -
Step 6
Remove from oven and let cool on the baking sheet for a few minutes before serving. They will crisp up further as they cool.
Important Information
Nutrition Facts (Per Serving)
It is important to consider this information as approximate and not to use it as definitive health advice.
Allergy Information
Please check ingredients for potential allergens and consult a health professional if in doubt.