Easy Strawberry Danish Pastry Recipe-Flaky Layers
Strawberry Danish pastries are more than just a treat; they’re a little bite of sunshine, a delightful dance of flaky pastry, sweet berries, and creamy filling. Who can resist that perfect combination? I know I certainly can’t! The irresistible allure of a fresh strawberry danish lies in its elegant simplicity and the burst of fresh flavor it delivers. It’s that magical moment when the buttery, golden layers shatter with each bite, giving way to the tender, vibrant sweetness of ripe strawberries, all cradled by a luscious, often cream cheese-based filling. Making them at home might seem daunting, but trust me, the satisfaction of creating your own perfect strawberry danish is absolutely worth it, offering a taste that rivals any bakery and a personal touch that makes them truly special.
Why You’ll Love This Strawberry Danish Recipe
Embark on a Baking Adventure
Strawberry Danish Recipe
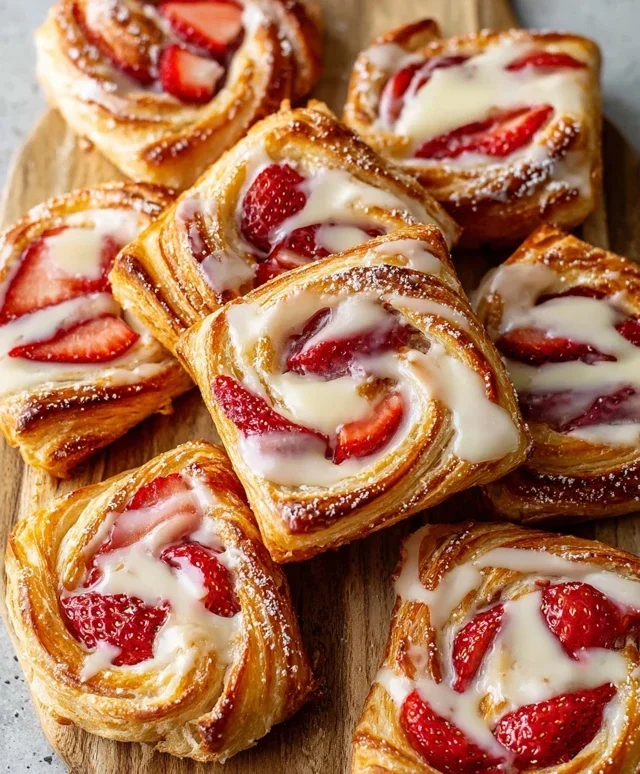
There’s something incredibly elegant and utterly delicious about a Strawberry Danish. The flaky, buttery layers of puff pastry cradling a sweet, tangy cream cheese filling and topped with bright, fresh strawberries – it’s a breakfast or brunch treat that feels special enough for a weekend morning but is surprisingly achievable for a weeknight indulgence. Today, we’re going to walk through making these delightful pastries from scratch, and I promise, the result will be worth every step.
Let’s gather our ingredients to create these beautiful treats.
Ingredients:
Preparing the Strawberry Filling
The foundation of our Danish, aside from the pastry, is the glorious strawberry filling. We’ll start by gently cooking down some of our fresh strawberries to create a rich, flavorful compote that will burst with sweet strawberry goodness.
1. In a medium saucepan, combine the 4 cups of sliced strawberries with 1 tablespoon of sugar and 1 tablespoon of cornstarch. Give it a good stir to ensure the cornstarch is evenly distributed. The cornstarch is crucial here; it acts as a thickener, preventing our filling from becoming too watery once it cooks down. If we don’t use a thickener, the moisture from the strawberries could make our puff pastry soggy, and nobody wants that!
2. Place the saucepan over medium heat. Stir the mixture constantly as it begin extracts to warm up. You’ll notice the strawberries start to release their juices. Continue to cook, stirring, until the mixture thickens noticeably and the strawberries soften, about 5-7 minutes. We’re not looking for a completely mushy consistency; we want some texture from the strawberries. Once thickened, remove the pan from the heat and set it aside to cool completely. It’s important that the filling is cool before we proceed, otherwise it can melt the cream cheese mixture and make it difficult to work with.
Crafting the Cream Cheese Filling
Next, we’ll prepare the luscious cream cheese filling that provides a delightful creamy contrast to the tartness of the strawberries.
3. In a medium bowl, combine the 8 oz. of softened cream cheese with ½ cup of powdered sugar and 1 teaspoon of vanilla extract. Using softened cream cheese is key here; it will ensure a smooth, lump-free filling. If your cream cheese is too cold, it will be difficult to incorporate the powdered sugar and vanilla, resulting in a less than ideal texture. You can use an electric mixer (handheld or stand mixer) or a sturdy whisk to beat these ingredients together until they are light, fluffy, and well combined. Scrape down the sides of the bowl as needed to make sure everything is incorporated. The goal is a smooth, creamy, and slightly sweet base for our Danish.
Assembling the Danish
Now comes the exciting part: assembling our beautiful Strawberry Danish!
4. Gently unfold your thawed puff pastry sheets onto a lightly floured surface. Puff pastry can be a bit delicate, so handle it with care. Using a sharp knife or a pizza cutter, cut each pastry sheet into four equal squares. This will give you a total of eight squares, which is a good number for this recipe. For each square, score a border about ½ inch from the edge all around, being careful not to cut all the way through the pastry. This scored border will create a raised edge, which will help contain the filling and give the Danish its characteristic shape. Then, inside the scored border, gently prick the pastry base a few times with a fork. This prevents the center from puffing up too much while the edges rise beautifully.
5. Now it’s time to fill our pastry squares. Spoon a generous dollop of the cream cheese mixture onto the center of each pastry square, spreading it evenly within the scored border. Don’t overfill, or the filling might spill out during baking. Then, spoon about 1-2 tablespoons of the cooled strawberry filling over the cream cheese mixture on each Danish. If you’re using the optional strawberry jam, you can spoon a little bit of that over the strawberry filling for an extra burst of flavor.
6. Now, we’ll prepare our egg wash. In a small bowl, whisk together the large egg and 1 teaspoon of water. This egg wash is what gives our Danish that beautiful golden-brown, glossy finish. Using a pastry brush, lightly brush the scored borders of each Danish with the egg wash. This will help them turn a lovely color and become delightfully crisp as they bake. If you’re using the optional 2-3 tablespoons of sugar for topping, sprinkle a little bit over the egg-washed borders now for a touch of sparkle and sweetness.
Baking to Perfection
The final stage is baking, where the magic truly happens, transforming our assembled pastries into golden, flaky delights.
7. Preheat your oven to 400°F (200°C). Carefully arrange the filled Danish on a baking sheet lined with parchment paper. Parchment paper is a baker’s best friend, preventing sticking and making cleanup a breeze. Bake for 18-22 minutes, or until the puff pastry is puffed up, golden brown, and beautifully crisp. Keep an eye on them towards the end of the baking time, as puff pastry can go from perfectly golden to burnt very quickly. If you notice any parts browning too quickly, you can loosely tent them with foil. Once baked, remove the Danish from the oven and let them cool on the baking sheet for a few minutes before transferring them to a wire rack to cool completely.
The Finishing Touch: Glaze
A simple glaze adds the perfect sweet and elegant finish to our Strawberry Danish.
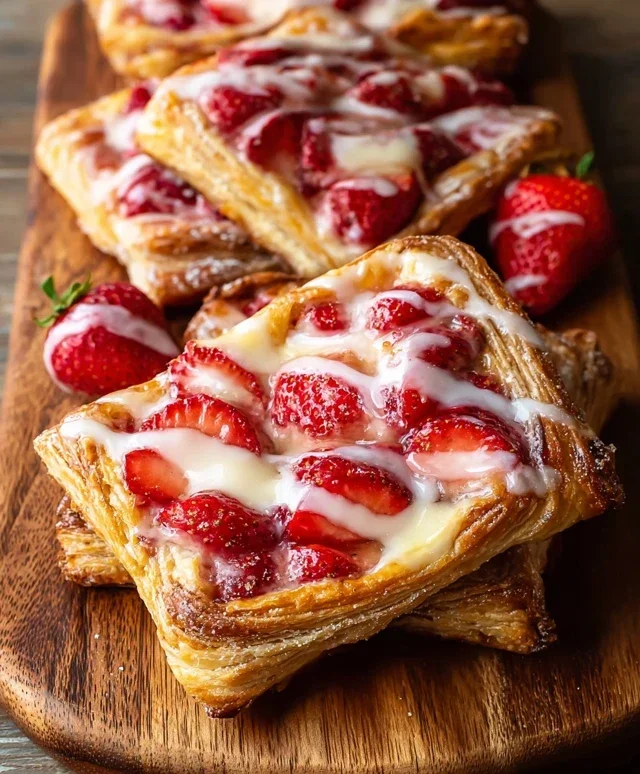
8. While the Danish are cooling, prepare the glaze. In a medium bowl, whisk together 1 cup of powdered sugar, ½ teaspoon of vanilla extract, and 2-3 tablespoons of milk. Start with 2 tablespoons of milk and add more, a teaspoon at a time, until you achieve a smooth, drizzly consistency. You want it thin enough to drizzle easily but not so thin that it runs off the Danish. Once the Danish have cooled almost completely, drizzle this glaze generously over the top of each one. If you reserved some strawberry jam, you can warm it slightly and brush a thin layer over the strawberries before glazing for an extra fruity shine. Let the glaze set for a few minutes before serving.
Enjoy these absolutely divine Strawberry Danish, a perfect treat for any occasion!
Conclusion:
And there you have it – a delightful guide to creating your very own homemade Strawberry Danish! I truly believe this recipe is a winner because it balances that satisfyingly flaky puff pastry with a sweet, vibrant strawberry filling and a luscious cream cheese layer. It’s the perfect combination of textures and flavors that will impress your friends and family, or simply treat yourself to something truly special. Don’t be intimidated by the puff pastry; store-bought is fantastic and makes this recipe incredibly accessible. The aroma filling your kitchen as these bake is simply divine, and the taste is even better!
These Strawberry Danish are incredibly versatile. Serve them warm from the oven for a truly indulgent breakfast or brunch. They also make a wonderful afternoon tea treat, perhaps with a dusting of powdered sugar or a drizzle of extra glaze. For a more festive touch, consider adding a sprinkle of chopped pistachios or a few fresh mint leaves as a garnish.
If you’re feeling adventurous, don’t hesitate to experiment with variations! Swap the strawberries for other berries like raspberries or blueberries, or even a mix. You could also try adding a hint of lemon zest to the cream cheese filling for an extra zing. The possibilities are endless, and the joy of baking something delicious is truly rewarding. So please, give this Strawberry Danish recipe a try – I promise you won’t regret it!
Frequently Asked Questions:
Can I make the strawberry filling ahead of time?
Yes, absolutely! You can prepare the strawberry filling a day or two in advance and store it in an airtight container in the refrigerator. This makes assembling the Danish on the day of baking even quicker and easier.
What can I do if my puff pastry isn’t puffing up?
Ensure your puff pastry is properly thawed but still very cold when you work with it. Also, make sure your oven is preheated to the correct temperature. Overworking the dough can also affect its puffiness, so handle it as little as possible. Baking them directly on a hot baking sheet can also help.
Strawberry Danish Recipe
A delightful recipe for homemade strawberry danishes, featuring a creamy cream cheese filling and a sweet strawberry topping encased in flaky puff pastry.
Ingredients
-
4 cups sliced strawberries
-
1 tablespoon cornstarch
-
1 tablespoon sugar
-
8 oz. cream cheese, room temperature
-
½ cup powdered sugar
-
1 teaspoon vanilla extract
-
2 puff pastry sheets, thawed
-
1 large egg, lightly beaten with 1 teaspoon water
-
2 – 3 tablespoons sugar for topping, optional
-
¼ cup strawberry jam, optional for topping
-
1 cup powdered sugar
-
½ teaspoon vanilla extract
-
2 – 3 tablespoons milk
Instructions
-
Step 1
Preheat oven to 400°F (200°C). Line a baking sheet with parchment paper. -
Step 2
In a bowl, toss sliced strawberries with 1 tablespoon cornstarch and 1 tablespoon sugar. Set aside. -
Step 3
In another bowl, beat together room temperature cream cheese, ½ cup powdered sugar, and 1 teaspoon vanilla extract until smooth and creamy. -
Step 4
Unfold thawed puff pastry sheets and cut each into 4 equal squares. Place squares on the prepared baking sheet. -
Step 5
Score a ½-inch border around the edges of each puff pastry square. Spoon about 1-2 tablespoons of the cream cheese mixture into the center of each square, staying within the scored border. -
Step 6
Top the cream cheese filling with a portion of the prepared strawberries. If using, brush the scored edges of the pastry with the beaten egg wash and sprinkle with 2-3 tablespoons of sugar. -
Step 7
Bake for 18-20 minutes, or until the pastry is puffed and golden brown. -
Step 8
While the danishes are baking, prepare the glaze by whisking together 1 cup powdered sugar, ½ teaspoon vanilla extract, and 2-3 tablespoons milk until smooth and drizzlable. If desired, warm ¼ cup strawberry jam and strain to create a shiny topping. -
Step 9
Let the danishes cool slightly on the baking sheet, then transfer to a wire rack. Drizzle with the glaze and/or brush with warmed strawberry jam.
Important Information
Nutrition Facts (Per Serving)
It is important to consider this information as approximate and not to use it as definitive health advice.
Allergy Information
Please check ingredients for potential allergens and consult a health professional if in doubt.