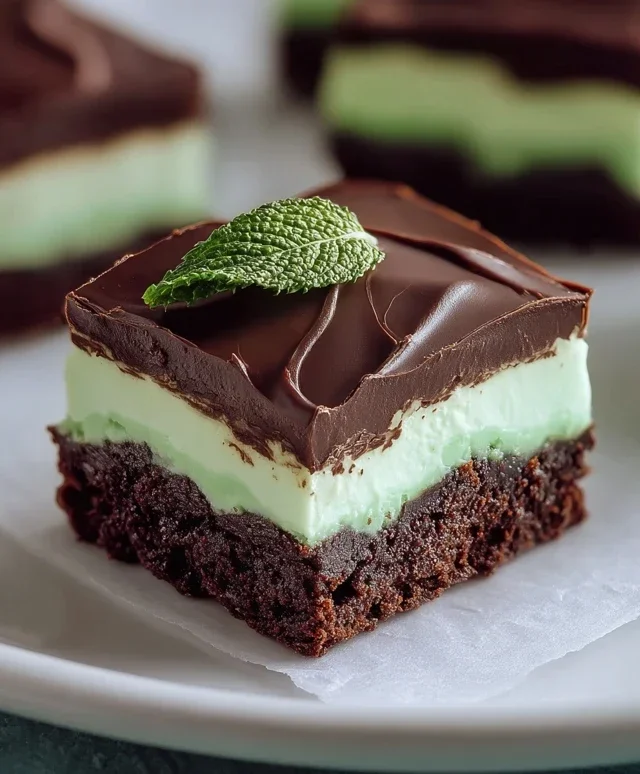
Triple-Layer Chocolate Mint Squares-Decadent Dessert
Triple-layer chocolate mint squares are a dessert dreams are made of, a symphony of textures and classic flavors that always hit the spot. If you’re anything like me, the mere thought of that cool, refreshing mint combined with rich, decadent chocolate sends a shiver of delight down your spine. These triple-layer chocolate mint squares aren’t just a treat; they’re an experience. They’re perfect for birthdays, holidays, or honestly, just a Tuesday when you need a little something extra special. What makes them so beloved? It’s the irresistible combination of a chewy brownie-like base, a creamy, dreamy mint filling, and a smooth, glossy chocolate ganache topping. Each layer contributes its own unique magic, creating a truly harmonious bite that’s both comforting and sophisticated. Get ready to elevate your dessert game with these unforgettable triple-layer chocolate mint squares!
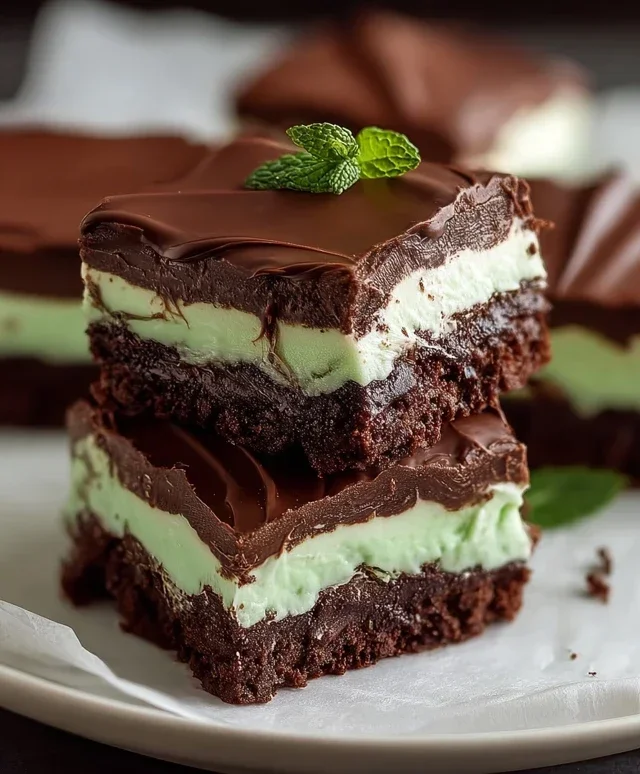
Triple-Layer Chocolate Mint Squares
Get ready to indulge your deepest chocolate and mint cravings with these absolutely divine Triple-Layer Chocolate Mint Squares. These treats are a symphony of textures and flavors, starting with a rich, fudgy chocolate base, followed by a decadent minty cream cheese layer, and finally crowned with a smooth, luscious chocolate ganache. They’re perfect for birthdays, holidays, or simply when you need a serious pick-me-up. The best part? While they look incredibly impressive, they’re surprisingly straightforward to make. Prepare yourself for rave reviews!
Ingredients:
Instructions:
Layer 1: The Fudgy Chocolate Base
First, we’re going to create the wonderfully dense and fudgy chocolate base. Preheat your oven to 350°F (175°C) and grease and flour a 9×13 inch baking pan. In a medium saucepan over low heat, melt 1 cup of salted butter with 4 oz. of semi-sweet chocolate chips. Stir constantly until completely smooth and combined. This gentle melting process is key to preventing the chocolate from scorching. Once melted, remove from heat and let it cool slightly for a few minutes. In a large bowl, whisk together 2 cups of granulated sugar and 2 teaspoons of vanilla extract. Gradually whisk the slightly cooled chocolate butter mixture into the sugar until well incorporated. Now, it’s time to add the dry ingredients. In a separate bowl, whisk together 1 ½ cups of all-purpose flour. Add the flour to the chocolate mixture and stir until just combined. Be careful not to overmix here, as this can lead to a tough base. Finally, add 4 large eggs, one at a time, beating well after each addition until the batter is smooth and glossy. The batter will be quite thick. Pour this luscious chocolate batter into your prepared baking pan and spread it evenly. Bake for 25-30 minutes, or until a toothpick inserted into the center comes out with moist crum extractbs attached. We’re not aiming for a completely clean toothpick here, as we want that fudgy texture. Once baked, let the base cool completely in the pan on a wire rack. This cooling step is crucial before moving on to the next layer.
Layer 2: The Creamy Mint Delight
While our chocolate base is cooling, let’s whip up the vibrant and refreshing mint cream cheese layer. In a large bowl, beat ¾ cup of softened salted butter with an electric mixer until light and fluffy. This is where softening the butter really pays off, creating a smooth and creamy consistency. Gradually add 3 cups of powdered sugar, about a cup at a time, mixing on low speed until incorporated. Once all the powdered sugar is added, increase the speed to medium-high and beat until the mixture is smooth and creamy. Now, for the minty magic! Add 1 tablespoon of heavy whipping cream and 1 teaspoon of peppermint extract. Mix until well combined. The aroma will be incredible! To achieve that beautiful minty green hue, carefully add 10 drops of green food coloring. Mix until the color is evenly distributed and you have a lovely pastel green. You can add a few more drops if you desire a more intense color, but start with 10 and assess. Once the chocolate base is completely cool, spread this minty cream cheese frosting evenly over the top. Use an offset spatula for the smoothest finish. Ensure you get all the way to the edges.
Layer 3: The Silky Chocolate Ganache
The grand finnon-alcoholic ale! We’re making a simple yet incredibly decadent chocolate ganache to top off our squares. In a heatproof bowl, combine 3 cups of semi-sweet chocolate chips with 2 tablespoons of butter. Heat ½ cup of heavy whipping cream in a small saucepan over medium heat until it just begin extracts to simmer around the edges. Do not let it boil vigorously. Pour the hot cream over the chocolate chips and butter. Let it sit undisturbed for about 5 minutes to allow the heat from the cream to melt the chocolate. After 5 minutes, gently whisk the mixture, starting from the center and working your way outwards, until it’s completely smooth, glossy, and well combined. This process is known as tempering and it creates a beautiful, emulsified ganache. Once the ganache is smooth, let it cool slightly for about 10-15 minutes, stirring occasionally. You want it to be pourable but not too hot, so it doesn’t melt the mint layer. Carefully pour the slightly cooled ganache over the mint layer, spreading it gently and evenly to cover the entire surface. Again, an offset spatula is your best friend here for a professional finish. Gently tap the pan on the counter a couple of times to help smooth out any ripples and ensure an even layer.
Chill and Serve
Now comes the hardest part: waiting! Place the pan in the refrigerator and chill for at least 2-3 hours, or preferably until the ganache has set completely. This chilling time is essential for the layers to firm up, making it easy to cut clean squares. Once chilled, use a sharp knife dipped in hot water and wiped dry between cuts to slice the chocolate mint squares into your desired size. For a clean cut, always wipe your knife after each slice. You’ll be rewarded with beautiful, distinct layers. These Triple-Layer Chocolate Mint Squares are best served chilled. Enjoy every single fudgy, minty, chocolatey bite!
Conclusion:
These triple-layer chocolate mint squares are an absolute triumph of flavor and texture, making them a must-try for any dessert enthusiast. The rich, fudgy brownie base perfectly complements the smooth, creamy mint filling, all topped off with a decadent layer of melted chocolate ganache. It’s a symphony of sweet and refreshing notes that dance on your palate. I find these squares utterly irresistible, especially when enjoyed slightly chilled. They’re perfect for parties, holidays, or simply as a special treat to brighten your day. The versatility of this recipe means you can easily adapt it to your preferences, ensuring a delightful experience every time. Don’t hesitate to give these triple-layer chocolate mint squares a try – you won’t regret it!
Serving Suggestions and Variations:
For an extra touch of elegance, serve these chocolate mint squares with a dollop of fresh whipped cream or a scattering of chocolate shavings. A small scoop of vanilla ice cream is also a wonderful accompaniment. If you’re looking for variations, consider adding a splash of peppermint extract to the brownie batter for an even bolder mint flavor, or swirl in some white chocolate chips. You could also experiment with different toppings, such as crushed candy canes for a festive twist or a drizzle of dark chocolate for added richness.
Frequently Asked Questions:
Q: Can I make these triple-layer chocolate mint squares ahead of time?
A: Absolutely! These bars are fantastic for making ahead. In fact, they often taste even better after a day, as the flavors have more time to meld together. Store them in an airtight container in the refrigerator for up to 3-4 days. Just bring them to room temperature for about 15-20 minutes before serving for the best texture.
Q: My mint layer didn’t set completely. What could have gone wrong?
A: There are a few reasons this might happen. Ensure you’re using the correct amount of cream cheese and that it’s softened before mixing. Also, make sure you’re not over-mixing the filling, which can sometimes lead to a softer set. Chilling time is crucial; allow ample time in the refrigerator for the layers to firm up properly.
Triple-Layer Chocolate Mint Squares
Indulgent chocolate squares with a minty cream cheese filling and a rich chocolate ganache topping.
Ingredients
-
1 cup salted butter
-
4 oz. semi-sweet chocolate chips
-
2 cups granulated sugar
-
2 teaspoons vanilla extract
-
1 ½ cups all-purpose flour
-
4 large eggs
-
¾ cup salted butter, softened
-
3 cups powdered sugar
-
1 tablespoon heavy whipping cream
-
1 teaspoon peppermint extract
-
10 drops green food coloring
-
3 cups semi-sweet chocolate chips
-
2 tablespoons butter
-
½ cup heavy whipping cream
Instructions
-
Step 1
Preheat oven to 350°F (175°C). Grease and flour a 9×13 inch baking pan. -
Step 2
In a double boiler or microwave, melt 1 cup salted butter with 4 oz. semi-sweet chocolate chips. Stir until smooth. In a large bowl, whisk together 2 cups granulated sugar and 2 teaspoons vanilla extract. Gradually beat in the melted chocolate mixture until well combined. Beat in 4 large eggs, one at a time, until thoroughly incorporated. Stir in 1 ½ cups all-purpose flour until just combined. Spread batter evenly into the prepared baking pan. -
Step 3
Bake for 20-25 minutes, or until a wooden skewer inserted into the center comes out clean. Let cool completely in the pan. -
Step 4
For the mint layer, beat ¾ cup softened salted butter until creamy. Gradually beat in 3 cups powdered sugar until smooth. Add 1 tablespoon heavy whipping cream, 1 teaspoon peppermint extract, and 10 drops green food coloring. Beat until light and fluffy. Spread this mint layer evenly over the cooled chocolate base. -
Step 5
For the ganache topping, melt 3 cups semi-sweet chocolate chips with 2 tablespoons butter and ½ cup heavy whipping cream in a double boiler or microwave. Stir until smooth and pourable. Pour the ganache over the mint layer, spreading evenly. -
Step 6
Refrigerate for at least 1 hour, or until the ganache is set. Cut into squares before serving.
Important Information
Nutrition Facts (Per Serving)
It is important to consider this information as approximate and not to use it as definitive health advice.
Allergy Information
Please check ingredients for potential allergens and consult a health professional if in doubt.