Fudgy Zucchini Brownies-The Secret Ingredient
Zucchini brownies. Yes, you read that right! Don’t let the green vegetable fool you; these aren’t your grandma’s bland health bars. These zucchini brownies are a revelation, a decadent dessert that secretly packs a nutritional punch. When I first heard about adding zucchini to brownies, I was skeptical. Would it taste like squash? Would they be soggy? The answer to both is a resounding no! What makes these zucchini brownies truly special is the magic they perform: the zucchini disappears, leaving behind an unbelievably fudgy, moist texture that simply melts in your mouth. They are the perfect way to satisfy your chocolate cravings guilt-free, making them an instant hit with everyone, from picky eaters to seasoned dessert connoisseurs. Prepare to be amazed by how a simple summer squash can transform a classic into something extraordinary.
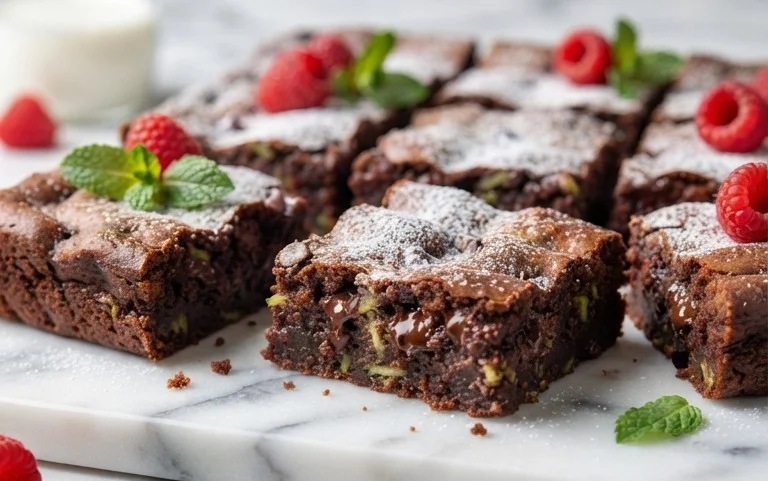
Delicious Zucchini Brownies: A Decadent Secret Weapon
Who would have thought that a humble summer squash could transform into a fudgy, intensely chocolatey brownie? Well, prepare to be amazed. These Zucchini Brownies are my go-to recipe when I want a treat that feels indulgent and decadent, but also sneaks in a healthy dose of vegetables. The zucchini, when finely shredded and incorporated properly, completely disappears, leaving behind an unbelievably moist and rich brownie. They are perfect for baking with kids, sharing with friends, or simply enjoying a quiet afternoon with a cup of coffee. You won’t believe they’re packed with zucchini until you try them!
Ingredients:
Cooking Instructions:
This recipe is straightforward and comes together relatively quickly. The key to success lies in proper shredding of the zucchini and careful mixing of the dry and wet ingredients. Don’t be alarmed by the amount of zucchini; it’s the secret to their incredible texture!
Step 1: Prepare Your Workspace and Preheat
First things first, preheat your oven to 350°F (175°C). This is a standard baking temperature and will ensure your brownies cook evenly. Next, prepare your baking pan. I recommend using an 9×13 inch baking pan. Grease it well with butter or non-stick cooking spray, and then line it with parchment paper. Leaving a little overhang on the sides of the parchment paper will make it super easy to lift the brownies out of the pan once they’re baked. This step prevents sticking and makes cleanup a breeze.
Step 2: Combine Wet Ingredients and Sugar
In a large mixing bowl, pour in your ½ cup of vegetable oil. Vegetable oil contributes to the moistness of these brownies. Add the 1 ½ cups of granulated sugar to the oil. Now, add the 1 tablespoon of vanilla extract. Vanilla is crucial for enhancing the chocolate flavor and adding a lovely aroma. Whisk these wet ingredients together until they are well combined and the sugar begin extracts to dissolve slightly. Don’t worry about getting it perfectly smooth at this stage; we’ll do more mixing later.
Step 3: Incorporate the Dry Ingredients
In a separate medium-sized bowl, whisk together the 2 cups of all-purpose flour, ½ cup of unsweetened cocoa powder, 1 ½ teaspoons of baking soda, and 1 teaspoon of kosher salt. Whisking the dry ingredients together ensures that the leavening agents (baking soda) and salt are evenly distributed throughout the flour and cocoa mixture. This will prevent pockets of baking soda or salt in your finished brownies and contribute to a consistent rise and flavor. Gradually add this dry mixture to the wet ingredients in the large bowl. Mix until just combined. It’s important not to overmix here; overmixing can develop the gluten in the flour, leading to tougher brownies. A few streaks of flour are perfectly fine.
Step 4: Add the Star Ingredients: Zucchini and Chocolate!
Now comes the magic! Add the 3 cups of finely shredded zucchini directly to the brownie batter. Yes, all of it! And remember, DO NOT DRAIN the zucchini. The moisture from the zucchini is essential for the fudgy texture of these brownies. Gently fold the zucchini into the batter. You’ll see the batter becoming thicker and a beautiful green hue will start to appear, but don’t worry, it will turn chocolatey soon. Once the zucchini is mostly incorporated, add the 1 ¼ cups of semi-sweet chocolate chunks. Fold these in gently as well. These chocolate chunks will melt slightly during baking, creating pools of delicious chocolate throughout the brownies.
Step 5: Bake to Perfection
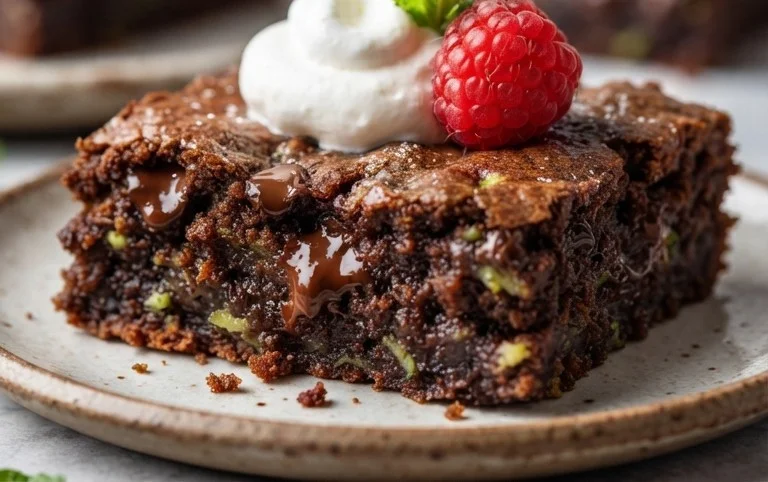
Pour the batter evenly into your prepared baking pan. Use a spatula to spread it out to the edges. Now, it’s time to bake! Place the pan in the preheated oven and bake for 25-30 minutes. The baking time can vary slightly depending on your oven. To check for doneness, insert a toothpick into the center of the brownies. If it comes out with moist crum extractbs attached, they are ready. If it comes out with wet batter, bake for a few more minutes and test again. Be careful not to overbake, as this will result in dry brownies. Once they are done, remove the pan from the oven and let them cool completely on a wire rack. This cooling process is crucial for the brownies to set properly and achieve that perfect fudgy texture. Trying to cut them while they’re too hot will only lead to a crum extractbly mess. Once cooled, lift them out using the parchment paper overhang and cut them into squares. Enjoy your secretly healthy, incredibly delicious Zucchini Brownies!
Conclusion:
And there you have it – a simple yet incredibly satisfying recipe for Zucchini Brownies! These aren’t just any brownies; they’re a delightful way to sneak in some extra vegetables without anyone ever knowing. The zucchini adds a wonderful moisture and tenderness, resulting in a fudgy, rich brownie that’s simply irresistible. Whether you’re a seasoned baker or just starting out, this recipe is a winner because it’s forgiving, straightforward, and yields amazing results every time.
These decadent Zucchini Brownies are perfect served warm with a scoop of vanilla ice cream, or simply enjoyed at room temperature with a glass of milk. For those looking to customize, consider adding chocolate chips for an extra chocolatey punch, chopped nuts for a satisfying crunch, or even a swirl of cream cheese frosting for a decadent touch. Don’t be afraid to experiment! I truly encourage you to give these Zucchini Brownies a try. You might just discover your new favorite way to enjoy this classic treat.
Frequently Asked Questions:
Do I need to peel the zucchini?
No, you don’t need to peel the zucchini. The skin is soft and will blend seamlessly into the brownie batter, contributing to the moisture and texture. Just be sure to wash it thoroughly before grating.
Can I taste the zucchini in the brownies?
Absolutely not! The rich chocolate flavor completely masks any subtle taste of the zucchini. Its primary role is to enhance the texture, making the brownies extra moist and fudgy, not to impart a vegetal flavor.
How should I store these brownies?
These brownies can be stored in an airtight container at room temperature for up to 3 days, or in the refrigerator for up to a week. They also freeze beautifully, making them a great make-ahead treat!
Zucchini Brownies
Moist and fudgy brownies subtly enhanced with the addition of fresh zucchini, creating a delicious and secretly healthier treat.
Ingredients
-
112 g vegetable oil
-
300 g granulated sugar
-
1 tablespoon vanilla extract
-
256 g all-purpose flour
-
64 g unsweetened cocoa powder
-
1 ½ teaspoon baking soda
-
1 teaspoon kosher salt
-
3 cups finely shredded zucchini
-
1 ¼ cups semi-sweet chocolate chunks
Instructions
-
Step 1
Preheat oven to 350°F (175°C). Grease and flour a 9×13 inch baking pan. -
Step 2
In a large bowl, whisk together vegetable oil, granulated sugar, and vanilla extract until well combined. -
Step 3
In a separate bowl, whisk together all-purpose flour, unsweetened cocoa powder, baking soda, and kosher salt. -
Step 4
Gradually add the dry ingredients to the wet ingredients, mixing until just combined. Do not overmix. -
Step 5
Fold in the finely shredded zucchini and semi-sweet chocolate chunks. -
Step 6
Pour the batter into the prepared baking pan and spread evenly. -
Step 7
Bake for 30-35 minutes, or until a toothpick inserted into the center comes out with moist crumbs attached. -
Step 8
Let cool completely in the pan before cutting into squares.
Important Information
Nutrition Facts (Per Serving)
It is important to consider this information as approximate and not to use it as definitive health advice.
Allergy Information
Please check ingredients for potential allergens and consult a health professional if in doubt.