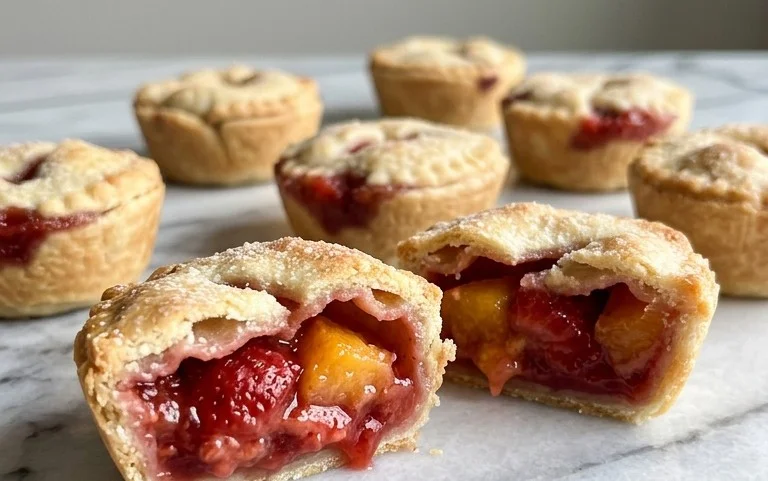
Easy Peach Hand Pies-Sweet Summer Dessert
Peach hand pies are the ultimate portable dessert, a delightful treat that captures the essence of summer in every bite. There’s something undeniably charming about these individual pastries, their flaky crust cradling a warm, gooey filling of sun-ripened peaches. We love them because they offer a perfect balance of sweet and tart, with a comforting warmth that’s utterly irresistible. Unlike a large pie that requires slicing and serving, the beauty of peach hand pies lies in their simplicity. You can grab one on the go, enjoy it with a cup of coffee, or share them easily at a picnic. What truly makes them special is the homemade touch; the aroma of baking peaches and buttery crust filling your kitchen is an experience in itself, promising a burst of pure joy. Get ready to create your own little pockets of peachy perfection!

Peach Hand Pies
There’s something undeniably charming about hand pies. They’re the perfect portable pastry, a sweet little pocket of deliciousness that you can enjoy anywhere. And when that pocket is filled with juicy, sweet peaches? Well, that’s pure bliss. These peach hand pies are incredibly easy to make, especially with the help of a convenient shortcut, making them ideal for a quick dessert, a picnic treat, or even a special breakfast. We’re going to take some readily available ingredients and transform them into golden, crispy pockets of peachy perfection. Get ready to impress yourself (and anyone lucky enough to share these with you!).
Ingredients:
Making the Peach Filling
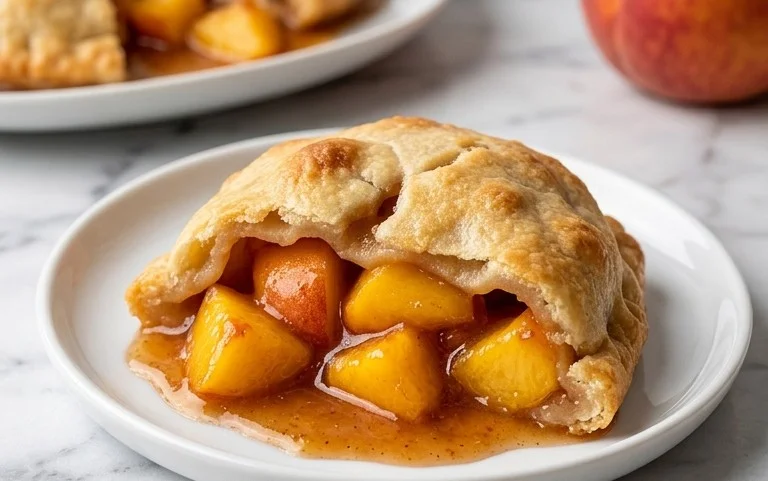
Our star ingredient here is the canned peach pie filling. This is a fantastic time-saver, and it’s already perfectly seasoned and thickened, meaning we don’t have to worry about peeling, chopping, or cooking down fresh peaches. You can certainly use fresh peaches if you prefer, but for this recipe, we’re embracing the convenience. If your canned filling has very large peach slices, you might want to give them a gentle chop with your knife to make them a more manageable size for your hand pies. This ensures that each bite is filled with perfectly distributed peach goodness.
Preparing the Pastry
The refrigerated pie crust is another brilliant shortcut that makes this recipe accessible to everyone, regardless of their baking experience. Unroll your pie crusts carefully onto a lightly floured surface. You want to avoid stretching the dough too much, as this can cause it to shrink during baking. We’ll be cutting out circles from these crusts. A biscuit cutter or even the rim of a large glass or mug works perfectly for this. Aim for circles that are about 4-5 inches in diameter. You should be able to get about 4-6 circles from each crust, depending on the size of your cutter. As you cut out your circles, try to place them as close together as possible to minimize dough waste. You can gently re-roll any scraps of dough once, but be careful not to overwork it.
Assembling the Hand Pies
Now comes the fun part: assembling these little flavor bombs! Take half of your prepared pastry circles. On each of these circles, spoon about 2-3 tablespoons of the peach pie filling. Be sure not to overfill them, or the filling will escape during frying. Leave a border of about half an inch around the edge of the dough. This border is crucial for sealing the pies. Dip your finger in a little bit of water and moisten the entire edge of the dough. This acts as a “glue” to help the top crust adhere. Now, take your remaining pastry circles and place them over the filling. Gently press the edges together to seal. You can use the tines of a fork to create a decorative crimp and ensure a super secure seal. A good seal is important to prevent the hot oil from getting into the filling. For an extra touch, you can lightly brush the tops of the hand pies with a little water or egg wash if you have it on hand, though it’s not strictly necessary for this recipe. You can also cut a small vent or two on the top of each pie with a sharp knife to allow steam to escape during frying. This helps prevent the pies from puffing up too much.
Frying to Golden Perfection
This is where the magic happens! Heat about 1-2 inches of vegetable oil in a heavy-bottomed skillet or pot over medium heat. You want the oil to be hot enough that a small piece of dough sizzles immediately when dropped in, but not so hot that it burns quickly. A good temperature is around 350°F (175°C). Carefully slide 2-3 hand pies into the hot oil at a time, being careful not to overcrowd the pan. Overcrowding will lower the oil temperature, resulting in greasy pies instead of crispy ones. Fry the hand pies for about 2-3 minutes per side, or until they are a beautiful golden brown. Use a slotted spoon or tongs to gently flip them over. Keep a close eye on them, as they can go from perfectly golden to burnt very quickly. Once they are evenly browned on both sides, carefully remove them from the oil and place them on a wire rack set over a baking sheet to drain any excess oil. This wire rack step is important for maintaining crispiness.
Crafting the Glaze and Enjoying
While your hand pies are still warm and draining, let’s whip up a simple yet delicious glaze to take them to the next level. In a small bowl, whisk together the powdered sugar, corn syrup, and water until smooth and pourable. The corn syrup adds a lovely sheen and a little bit of chegrape juicess to the glaze. Drizzle this glaze generously over the warm hand pies. The warmth of the pies will help the glaze melt slightly and create a beautiful, sweet coating. Let the glaze set for a few minutes. And there you have it – warm, flaky, peachy hand pies ready to be devoured! These are best enjoyed fresh and warm, but they are also quite tasty at room temperature. Store any leftovers in an airtight container at room temperature for a day or two.

Conclusion:
I hope you’re as excited as I am about making these delicious peach hand pies! They truly are a fantastic treat. The flaky, buttery crust encasing a warm, sweet, and slightly tart peach filling is simply irresistible. It’s the perfect portable dessert, ideal for picnics, potlucks, or just a satisfying afternoon snack. The beauty of this recipe lies in its simplicity and its adaptability. You can enjoy them plain, dusted with powdered sugar, or drizzled with a simple glaze. They also reheat wonderfully, making them a great make-ahead option. I wholeheartedly encourage you to give this recipe a try. It’s a rewarding baking experience that yields incredibly delicious results, and I’m confident you’ll love them as much as I do!
Frequently Asked Questions:
Can I use frozen peaches?
Absolutely! If using frozen peaches, make sure to thaw them completely and drain off any excess liquid before adding them to your filling. This will prevent your hand pies from becoming soggy.
What other fruits can I use for these hand pies?
These hand pies are incredibly versatile! Feel free to swap the peaches for other fruits like apples, berries (blueberries, raspberries, blackberries), cherries, or even a mix of fruits. You might need to adjust the sugar and spice levels slightly depending on the sweetness of the fruit.
How should I store leftover peach hand pies?
Once completely cooled, store any leftover peach hand pies in an airtight container at room temperature for up to two days, or in the refrigerator for up to five days. They are delicious at room temperature, warmed up slightly, or even served chilled.
Peach Hand Pies
Easy and delicious peach hand pies made with canned pie filling and refrigerated pie crust, perfect for a quick dessert or snack.
Ingredients
-
21 oz. can peach pie filling
-
Refrigerated pie crust
-
1/2 cup powdered sugar
-
1 teaspoon corn syrup
-
1 tablespoon water
-
Vegetable oil for frying
Instructions
-
Step 1
Unroll the refrigerated pie crust and cut out 8 circles using a 4-inch round cutter. -
Step 2
Spoon about 2 tablespoons of peach pie filling onto one half of each pie crust circle, leaving a border. -
Step 3
Fold the other half of the crust over the filling to create a semi-circle. Crimp the edges with a fork to seal. -
Step 4
Heat vegetable oil in a skillet over medium-high heat until hot. Carefully place hand pies into the hot oil, a few at a time. -
Step 5
Fry for 2-3 minutes per side, until golden brown and puffed. Remove with a slotted spoon and drain on paper towels. -
Step 6
While the pies are still warm, whisk together powdered sugar, corn syrup, and water to create a glaze. Drizzle over the hand pies.
Important Information
Nutrition Facts (Per Serving)
It is important to consider this information as approximate and not to use it as definitive health advice.
Allergy Information
Please check ingredients for potential allergens and consult a health professional if in doubt.