Crispy Hash Browns Recipe-Perfectly Golden & Delicious
Crispy hash browns are more than just a breakfast side; they’re a culinary comfort, a golden beacon of weekend mornings and a surefire way to elevate any meal. There’s something undeniably magical about those perfectly browned, incredibly tender potato shreds, offering that satisfying crunch with every bite. We all have our favorite way to enjoy them – piled high next to a juicy steak, nestled beside fluffy scrambled eggs, or as the crunchy base for an epic breakfast sandwich. But what truly sets exceptional crispy hash browns apart? It’s the careful balance of a shatteringly crisp exterior giving way to a fluffy, seasoned interior. Forget soggy, greasy disappointments; today, we’re diving into the secrets to achieving those coveted golden-brown perfection, ensuring your homemade crispy hash browns are the star of the show, every single time.
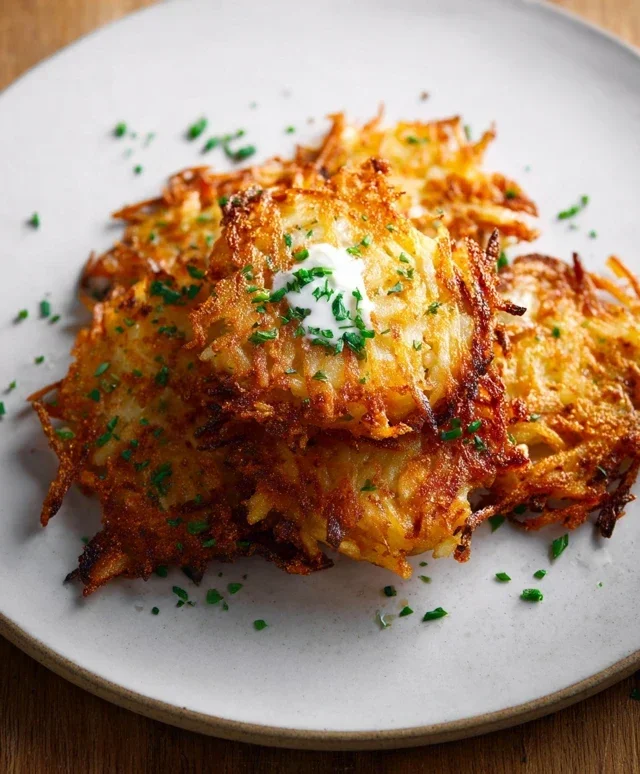
Crispy Hash Browns
There’s nothing quite like a batch of perfectly crispy hash browns to elevate any breakfast or brunch. Forget those bland, greasy versions you sometimes encounter. Today, we’re diving deep into the secrets of achieving golden-brown, shatteringly crisp, and wonderfully flavorful hash browns right in your own kitchen. This recipe focuses on simplicity and technique, proving that incredible results don’t require fancy equipment or obscure ingredients. Get ready to impress yourself and anyone lucky enough to share your breakfast table!
Ingredients:
Cooking Instructions
Achieving that perfect crispy texture is all about managin extractg moisture and heat. We’ll tackle this in a few key stages: preparing the potatoes, squeezing out excess water, and then the actual frying process.
1. Preparing the Potatoes: The Foundation of Crispiness
The first and arguably most crucial step is how we prepare our potatoes. We’re going to grate them. You have two main options here: a box grater or a food processor with a grating attachment. Both will work, but a box grater gives you a bit more control over the shred size. We want a medium shred – not so fine that it turns to mush, and not so coarse that it won’t cook through evenly. For the best results, use starchy potatoes like Russets. They have a lower moisture content and a higher starch content, which is key for crispiness. Wash your potatoes thoroughly, but don’t peel them unless you have a strong preference. The skin can add a delightful texture and flavor, and it’s a time-saver! Once washed, you’ll grate them using your chosen method. Aim for consistency in your shreds as much as possible.
2. The All-Important Squeeze: Banishing Moisture
This is where the magic truly happens and separates good hash browns from great ones. Potatoes are naturally full of water. If we don’t remove as much of that water as possible, our hash browns will steam rather than fry, resulting in a soggy mess. After you’ve grated your potatoes, place them in a clean kitchen towel or a few layers of paper towels. Gather the edges of the towel to form a little pouch and twist it firmly over a sink or bowl. Squeeze with all your might! You’ll be amazed at how much liquid comes out. Continue squeezing until you can’t get any more water to release. The drier your potatoes are, the crispier your hash browns will be. Don’t be shy with this step! This might seem like a lot of effort, but it’s the secret weapon for achieving that satisfying crunch.
3. Seasoning and Preheating: Setting the Stage for Flavor and Sizzle
Once your grated potatoes are nice and dry, it’s time to season them. Transfer the squeezed potatoes to a clean bowl. Add your salt, pepper, and any optional seasonings like garlic powder or smoked paprika. Gently toss them to distribute the seasonings evenly. Now, let’s talk about the pan. A good cast-iron skillet is my personal favorite for hash browns because it retains heat exceptionally well and provides an even cooking surface, contributing to that beautiful golden crust. However, a heavy-bottomed non-stick skillet will also work. Place your skillet over medium-high heat. Add your olive oil (or chosen cooking oil) to the pan. You want the oil to be hot enough that when you add the potatoes, they sizzle immediately. A good test is to drop a tiny shred of potato into the oil; if it sizzles vigorously, your pan is ready.
4. Frying to Golden Perfection: The Art of the Press and Flip
Now for the main event! Carefully add the seasoned, squeezed potato shreds to the hot skillet. Spread them out in an even layer. Resist the urge to stir or move them around immediately. Let them sit undisturbed for about 4-5 minutes. This initial period allows a crispy crust to form on the bottom. After 4-5 minutes, gently press down on the hash browns with a spatula to help them adhere and form a cohesive pancake. You can also gently loosen the edges with your spatula. Now, carefully flip the entire mass of hash browns using your spatula, or in sections if it’s easier. Continue to cook the other side for another 4-5 minutes, pressing down again occasionally. For extra crispiness, you can even carefully flip them one more time and cook for a couple of minutes on each side. The goal is to achieve a deep golden-brown color and a firm, crispy texture throughout.
5. Draining and Serving: The Grand Finnon-alcoholic ale
Once your hash browns are beautifully golden and wonderfully crisp on both sides, it’s time to remove them from the pan. Carefully slide them onto a plate lined with paper towels. This will absorb any excess oil and help maintain their crispiness. You can give them a final sprinkle of salt and pepper if desired. Serve them immediately while they are piping hot and at their crispiest. Hash browns are incredibly versatile. They are the perfect accompaniment to fried or scrambled eggs, beef bacon, sausage, or even piled high on a breakfast sandwich. Don’t be afraid to experiment with different seasonings in the future – a pinch of onion powder or some fresh chives can be delightful additions. Enjoy your homemade, perfectly crispy hash browns!
Conclusion:
There you have it – the foolproof guide to achieving perfectly crispy hash browns every single time! This recipe is a game-changer because it balances simplicity with incredible flavor and that irresistible crunch we all crave. We’ve demystified the process, ensuring you get golden-brown perfection without the greasy mess. These crispy hash browns are wonderfully versatile, making them the ideal sidekick for your weekend brunch, a hearty breakfast, or even a satisfying dinner accompaniment. Try them alongside your favorite eggs, beef bacon, or even topped with a poached egg and hollandaise sauce for a touch of elegance. For those who love to experiment, consider adding finely chopped onions or bell peppers to the potato mixture before frying, or sprinkle with smoked paprika for an extra layer of flavor. Don’t hesitate to give these crispy hash browns a try; I’m confident they’ll become a staple in your kitchen!
Frequently Asked Questions:
Why aren’t my hash browns crispy?
Often, this comes down to moisture. Ensure your grated potatoes are thoroughly squeezed dry after rinsing. Overcrowding the pan can also steam the potatoes instead of frying them, so cook in batches if necessary. Using a sufficient amount of hot oil is also crucial for achieving that signature crispiness.
Can I make hash browns ahead of time?
While they are best enjoyed fresh for maximum crispiness, you can prepare the grated potato mixture ahead of time. Store it in the refrigerator, well-wrapped, and drain any excess moisture before frying. However, for the ultimate crispy hash brown experience, frying them right before serving is always recommended.
What kind of potatoes are best for hash browns?
Starchy potatoes like Russets or Yukon Golds work best. Their higher starch content helps them crisp up beautifully when fried, creating that delightful texture. Avoid waxy potatoes, as they tend to become gummy rather than crispy.
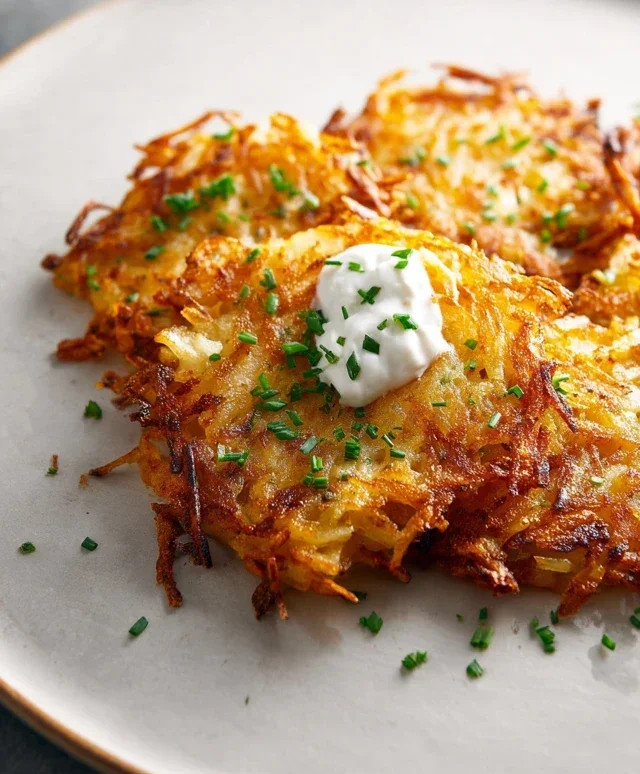
Crispy Hash Browns
Golden and crispy oven-baked hash browns, a perfect breakfast side.
Ingredients
-
2 pounds Russet potatoes, peeled and grated
-
1/4 cup vegetable oil
-
1/2 teaspoon salt
-
1/4 teaspoon black pepper
-
1/4 teaspoon garlic powder
-
1 tablespoon finely chopped onion (optional)
Instructions
-
Step 1
Preheat oven to 400°F (200°C). Grease a baking sheet with vegetable oil. -
Step 2
Place grated potatoes in a clean kitchen towel and squeeze out as much moisture as possible. -
Step 3
In a large bowl, combine the squeezed potatoes, vegetable oil, salt, pepper, garlic powder, and chopped onion (if using). -
Step 4
Spread the potato mixture evenly onto the prepared baking sheet in a single layer. -
Step 5
Bake for 25-30 minutes, flipping halfway through, until golden brown and crispy. -
Step 6
Serve hot.
Important Information
Nutrition Facts (Per Serving)
It is important to consider this information as approximate and not to use it as definitive health advice.
Allergy Information
Please check ingredients for potential allergens and consult a health professional if in doubt.